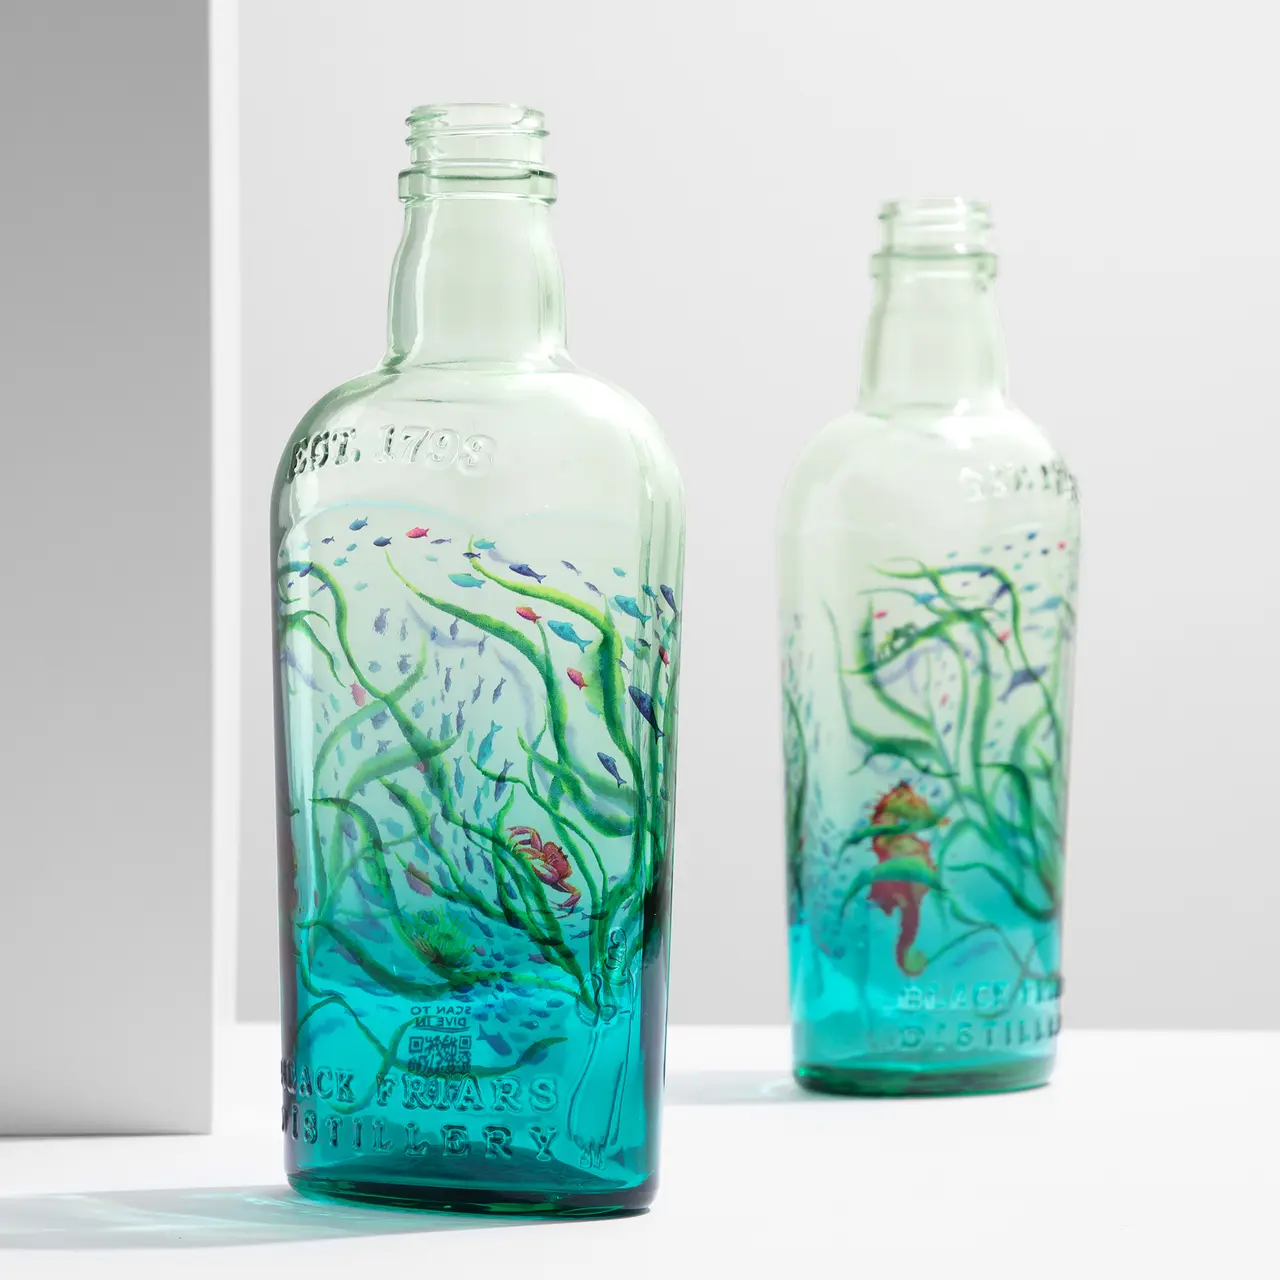
Sublimation printing on glass offers unmatched flexibility and visual impact, but to achieve consistent, high-quality results you must prepare your artwork with precision. Below are best practices and technical guidelines to ensure your files are truly print-ready for industrial glass decoration.
1. File Formats & Resolution
- Accepted Formats: AI (Illustrator), PSD, or TIFF.
- Resolution: 600–1200 dpi at final print dimensions to preserve fine detail and gradients.
- Color Mode: CMYK only (no RGB). Although sublimation can reproduce hundreds of thousands of tones, final output is driven by CMYK separations.
2. Layout & Bottle Templates
- Use the Technician’s Template: Always import the bottle wrap template provided by Atiu’s glass-sublimation technician. This accounts for curvature, distortion, and seam placement.
- Seamless Wrap: Art must extend edge-to-edge with no gaps at left/right borders; the design will wrap continuously around the bottle.
- Safe Zones:Neck/Bottom: avoid text and stripes in this areas that may be distorted.
3. Color Management & Smart Objects
- Smart Objects: Embed logos, text blocks, patterns, and images as Smart Objects (or linked vectors) so each element can be individually profiled and calibrated.
- Color Calibration:Test swatches on glass if possible to validate hue shifts and dot gain.
- Transparency & Primer Interaction: Sublimation prints all layers with transparency. Final opacity and finish result from the underlying primer layer (opaque, clear, metallic, or mixed degradé).
4. Distortion Compensation
A pre-distort artwork is recommended to counteract stretching over curved sections (neck, shoulder, curves). Use the template’s distortion grid to guide your corrective transformations.
5. Final Checks & Export
- Embed All Assets & Fonts: Package every linked object and font file with your native AI/PSD.
- Flatten Transparencies: Once Smart Objects are locked in, flatten to CMYK composites for RIP compatibility.
- Proof File: Provide a layered native file plus a flattened TIFF or PDF proof embedding the CMYK ICC profile.
- 600 dpi Verification: Zoom artwork to 100%—no visible pixels. If any pixelation appears, increase source resolution before export.
Other Technologies
Here’s a mini-guide to preparing print-ready files for complementary glass-decoration techniques:
Serigraphy (Screen Printing) Setup
- Artwork Format: Vector AI or PDF at final dimensions; separate each spot colour into its own layer.
- Color Limits: Up to 4 spot inks; specify Pantone® numbers, trapping, and overprint.
- Template: Maintain 10 mm from the back seam on round bottles and 5 mm from base or edges on square bottles.
Tampography (Pad Printing) Setup
- Artwork Format: High-contrast vector (AI/EPS); all text converted to outlines.
- Color & Area: Up to 2 spot inks; typical print window ≤ 80 × 50 mm, or ≤ 1⁄5 of a round bottle’s circumference.
- Templates & Compensation: Use the pad-printer’s curved-surface template; add 5 mm safety margin from edges/base and counter-distort for neck/heel regions.
Everything begins with the conception of the file—this is where creative intent and technical constraints meet. Ensuring your artwork is correctly formatted, colour-managed, and distortion-compensated is the first step in bringing any design—whether screen-printed, pad-printed or sublimated—to life. The medium may change, but the integrity of the original vision must always find its perfect expression.